Table of Contents
MIDI Mapper
Intro
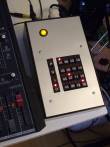
This page describes the MIDI-Channel-Mapper device, which can route input channels of a single hardware input to output channels of a single hardware output in any way you want. The device's user interface is designed to allow switching the routing of some channels while performing, leaving other routings untouched.
Features
- One MIDI hardware-input
- One MIDI hardware-output
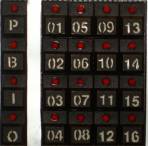
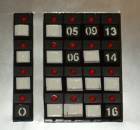
- Four “screen” - buttons (preset / bus / input / output)
- 16 “value-buttons”
- 16 presets
- 16 buses
- ultra-flexible channel mapping (merging / splitting etc.)
- designed to manipulate routing while playing
You can realize every imaginable channel mapping within the 16 input and output channels, and you have the ability to use the device in live or studio situations, for example to switch the routing of a subset of input channels to a target device with the push of one button.

Buses
The routing is oranized with buses. To each of the 16 buses, input and output channels can be assigned. The events from the input channels of a bus will be routed to it's output channels. There will be no redundant routing, this means if you route channel 2 → 7 on more than one bus, a incoming event on channel 2 will just be sent once to the output 7. The goal of all this is to have some routings fixed, while you can play arround on the currently selected bus without affecting the routings on the other buses.
User Interface Screens
The user interface is organized in four screens. If you switch to a screen by pushing the screen button, the value button LED's reflect the setup for this screen, with pushing the buttons, you manipulate the setup.
The preset screen is the top-level-screen. Pushing a value button loads a preset (1-16). Pushing [preset]+[X] saves the current setup to the preset X. Holding [preset] for > 3 sec clears all presets (“factory reset”). After the reset, the first preset has a “straight” setup: in 1 → out 1, in 2 → out 2 etc., all other presets will be empty (no forwarding).
On the bus screen, you select the bus. This does not affect the routing, but you will “work” on this bus then, that means if you switch to input or output screen, you will assign input/output channels to the bus that is currently selected. To reset (clear) the currently selected preset, just hold the bus-screen button for > 3 sec.
On the input and output screens, you assign in/out channels to the currently selected bus. Multiple values can be selected by using the screen button as shift key: [input]+[1]+[7]+[3]. This way channels can be added/removed from a bus. Pushing a single value button again will switch off the other values, and switch the state of the pushed value.
Usage Example
To give you an idea of the use of all this, have a look at this simple example:
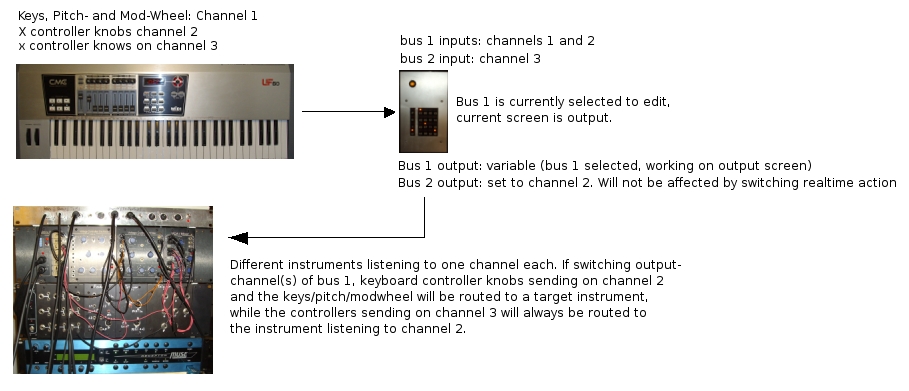
The reasons why I built the device: on my masterkeyboard I can switch the output channel of the keyboard section (keys/pitch wheel/mod wheel), but this can only be done by performing shift+channel → choose channel by encoder → push ok. But I rather like to just push one button to route the events to my target instrument. For all the faders/rotaries I can assign individual channels/events, but these channels will not be affected by changing the output channel of the keys section. With the MIDI-Mapper I can do for example this: have some faders routed to a fixed target (instrument/sequencer etc.), and others on the same bus with the keyboard section channel to a target instrument that I can change quickly while playing on the keyboard. 1000's of other possibilities can be imagined.
Also refer/print the usage manual in the extra-section at the bottom of the page for information about how to handle the device.
Additional Lookup Functions
There are additional “lookup” functions. They just show information about the current setup:
“which buses have (any)input channels assigned?”: [bus]+[input]
“which buses have input channel X assigned?”: [bus]+[input]+[value X]
“which buses have (any)output channels assigned?”: [bus]+[output]
“which buses have output channel X assigned?”: [bus]+[output]+[value X]
“which inputs are assigned to a(any) bus ?”: [input]+[bus]
“which inputs are assigned to bus X?”: [input]+[bus]+[value X]
“which inputs are routed to (any) output:”: [input]+[output]
“which inputs are routed to output X:”: [input]+[output]+[value X]
“which outputs are assigned to a(any) bus?”: [output]+[bus]
“which outputs are assigned to bus X ?”: [output]+[bus]+[value X]
“which outputs are fed by (any) input:”: [output]+[input]
“which outputs are fed by input X:”: [output]+[input]+[value X]
The value LED's will show the information as long you hold the screen buttons.
Skills / Equipment Required
Hardware
What modules do I need?
List of parts
- 1x MBHP Core Module
- 1x MBHP Bankstick Module
- 1x MBHP DIN Module (just 3 SR IC's will be used)
- 1x MBHP DOUT Module (just 3 SR IC's will be used)
- Labor board with rows for buttons board & bankstick
- Power input jack
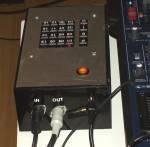
- 2 MIDI-jacks for MIDI-in and MIDI-out
- Litz wire
- Power-switch with backlight
- 20 buttons with built-in LED's
- Housing
- 7-10V Power supply (AC or DC), > 700mA
Connections
Connect the buttons / LED's to DIN and DOUT module like shown in the following table:
| Button / LED | button to MBHP | LED to MBHP |
|---|---|---|
| Preset | DIN J3 (SR 1) D0 | DOUT J3 (SR 1) D7 |
| Bus | DIN J3 (SR 1) D1 | DOUT J3 (SR 1) D6 |
| Input | DIN J3 (SR 1) D2 | DOUT J3 (SR 1) D5 |
| Output | DIN J3 (SR 1) D3 | DOUT J3 (SR 1) D4 |
| Value 1 | DIN J4 (SR 2) D0 | DOUT J4 (SR 2) D7 |
| Value 2 | DIN J4 (SR 2) D1 | DOUT J4 (SR 2) D6 |
| Value 3 | DIN J4 (SR 2) D2 | DOUT J4 (SR 2) D5 |
| Value 4 | DIN J4 (SR 2) D3 | DOUT J4 (SR 2) D4 |
| Value 5 | DIN J4 (SR 2) D4 | DOUT J4 (SR 2) D3 |
| Value 6 | DIN J4 (SR 2) D5 | DOUT J4 (SR 2) D2 |
| Value 7 | DIN J4 (SR 2) D6 | DOUT J4 (SR 2) D1 |
| Value 8 | DIN J4 (SR 2) D7 | DOUT J4 (SR 2) D0 |
| Value 9 | DIN J5 (SR 3) D0 | DOUT J5 (SR 3) D7 |
| Value 10 | DIN J5 (SR 3) D1 | DOUT J5 (SR 3) D6 |
| Value 11 | DIN J5 (SR 3) D2 | DOUT J5 (SR 3) D5 |
| Value 12 | DIN J5 (SR 3) D3 | DOUT J5 (SR 3) D4 |
| Value 13 | DIN J5 (SR 3) D4 | DOUT J5 (SR 3) D3 |
| Value 14 | DIN J5 (SR 3) D5 | DOUT J5 (SR 3) D2 |
| Value 15 | DIN J5 (SR 3) D6 | DOUT J5 (SR 3) D1 |
| Value 16 | DIN J5 (SR 3) D7 | DOUT J5 (SR 3) D0 |
Other connections
| power supply jack | power switch |
| power switch | core module J1 (not polarized) |
| power switch backlight | Core Module J2 (polarized!) |
| DIN / DOUT J1 | Core Module J8 / J9 |
| Bankstick | Core Module J4 |
See the MBHP documentation to learn how to exactly connect DIN/DOUT/Bankstick to the core module.
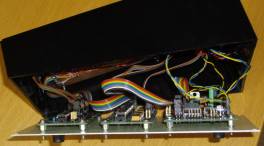
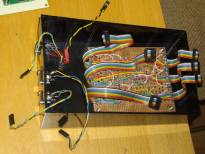
The board for the buttons is realized with a labour board with copper rows:


On one side you have the DIN ribbon cables, on the other the DOUT's. On each ribbon cable you have eight of them, one track is a ground. One track stays unused. The connections must match the assignment of the DIL pin-headers for the connection to the DIN/DOUT boards. Note that DOUT's are counted backward for each SR/plug/ribbon cable. See this page for more information about the issue.
Enclosure / Case
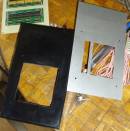
The Case used is a standard case from a local case manufacturer (http://www.jaegerag.ch). The bottom plate is metal, the top metal plate is just a thin cover, which is layed over the plastic top.
Enclosure References
Software
Setting Up
PIC's must be setup with MIOS bootstrap Loader and MIOS before an application can be uploaded.
If you purchased you PIC from SmashTV or Mike's PCB Shop these will already installed.
We recommend you read the following before you continue:
Download
Setup Instructions
- Upload the project.hex file from the zip-package with MIOS-studio to your MIDIBox - core
- Initialize the patches on the bankstick by holding the patch-screen-button for at least 3 sec. All the LED's will flash 7 times.

