This is an old revision of the document!
Questionable's Midibox Projects
History: Several years ago, I started work on an Analogue Modular Synth (still unfinished), which was to include a Midibox Midi→CV component. Like the synth, the Midi→CV was never finished. Recently, I've been getting back into DJ'ing (Traktor) and playing around with visuals (VDMX), and wasn't happy with any of the controllers on the market for those uses. I decided to take another look at creating a Midibox controller, and thus this Traktor project was born.
Elsewhere: I have created a blog that details the construction of this Midibox and other music/video hardware that I'm working on. You can find it at http://www.nonsilence.com
Note: I wouldn't recommend anyone copy my design, part selection, etc, until I have finished the project and have confirmed that it all works. I'll be sure to rename the headline below once I've finished everything.
Another Traktor Controller (A Work In Progress):
My controller is designed to provide controls for the features I use most in Traktor. Because of this, I've left out controls for features that other users might find essential (looping, pitch control, etc). There is also a section of the controller that is specifically for functions in VDMX, and will not be used for Traktor. In addition to the Midibox controller, VDMX is controlled by a DIY Arduinome (Monome http://monome.org/ clone).
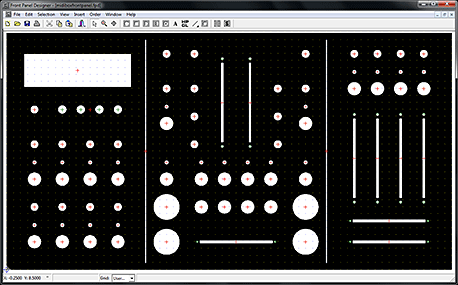
Panel Layout: The first thing to do was the Panel layout, to determine what configuration of Midibox modules I was going to need. I decided to have the panel made by Front Panel Express rather than attempt it myself.
Note: I have realized that this is not the most recent screenshot of the panel layout. You can easily see the differences between this and the finished product.
Left Panel: This portion controls the effects, and houses the display. The buttons directly under the display are the nav, execute, and snap buttons to navigate the menus. There is also a pot directly under the LCD to control the backlight brightness. Below that are two sets of 4 buttons, LED's, and Pots. The buttons control the on/off state of individual parameters in the Traktor effects, while the pots control the variable values. There are two sets of these controls, as there are two main effects busses in the current version of Traktor Pro.
Middle Panel: The middle panel is all Traktor controls. The large buttons on either side of the crossfader are arcade buttons, built for heavy use, that control the play/stop and sync functions. The two vertical faders are volume (no pitch faders for me). Directly to the sides of the volume faders are EQ pots, with filter sweep buttons/pots next to them. Directly under the volume faders are FX 1&2 on/off buttons, one set for each deck. The 8 buttons directly above the crossfader are cue point selections. The three pots at the top of this panel are my headphones, mix, and master volume levels.
Right Panel: The right side of the controller is all generic pots, buttons with LED's, and faders to be used with VDMX for a variety of functions. I swayed heavily towards faders/pots on that side, as my Arduinome has the button issue covered.
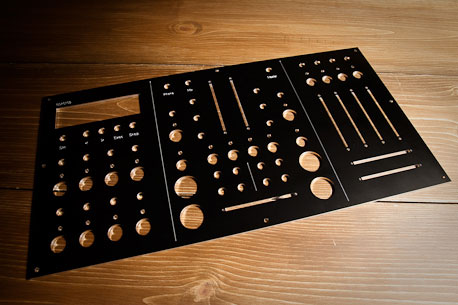
Here is a picture of the finished panel.
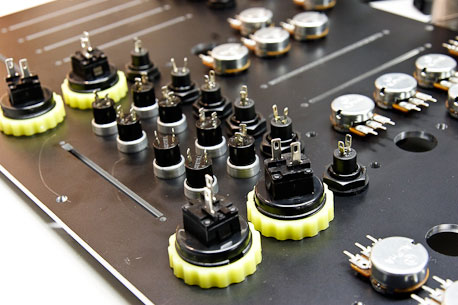
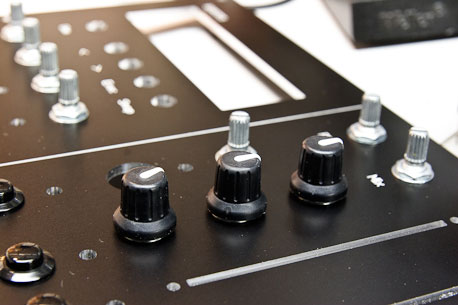
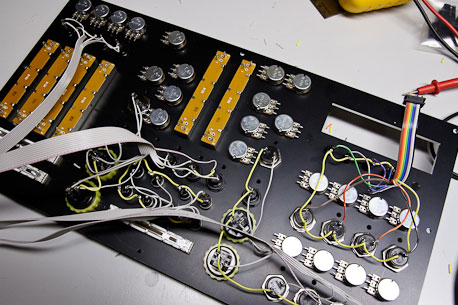
Here are a few pictures of the front panel being populated with pots, faders, buttons, and LED's.
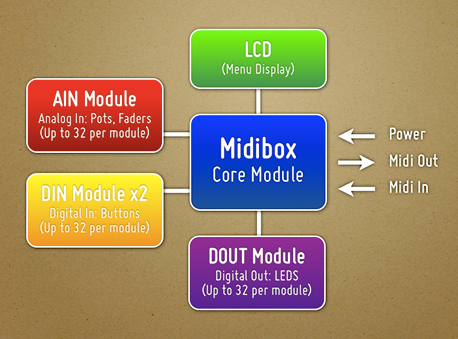
Midibox Module Selection: The final tally of buttons, faders, and LED's is what determines the number and types of modules that you require. Mine is as follows:
- Buttons: 36
- Faders: 9
- Pots: 23
- LED: 20
This means that I will need the following Midibox modules:
Part Selection: As I am in the U.S., I have primarily ordered from U.S. vendors (Mouser, AllElectronics, SmashTV, etc), although several of the parts had to be ordered from other countries when domestic suppliers couldn't be found.
Midibox Modules: All of my Midibox modules have been ordered from SmashTV http://www.avishowtech.com/mbhp/index.html, who is the U.S. supplier of most of the Midibox PCB's. They also carry kits that include all (or most) of the required parts to populate the PCB's, as well as additional odds and ends that you'll probably need as you build your controller.
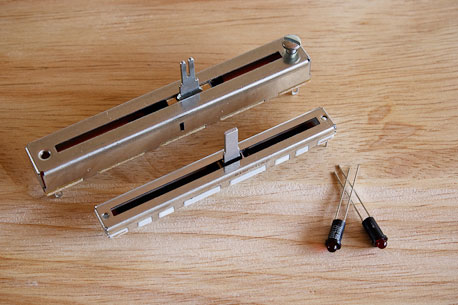
Faders and Fader Caps: I'm using two different types of faders on my Midibox. The first is an Alps fader (Mouser # 688-RS6011SY6002) which is a relatively decent fader, although not terribly light in touch. The second is an Alpha Fader (Mouser # 312-9301F-10K) which is considerably cheaper than the Alps, but not quite as nice. The Alps faders are being used for the 3 crossfaders, while the Alpha's are used for the remaining vertical faders. In retrospect, I might have been better served with faders that have a slightly shorter stem that fits the caps, as mine are a tad bit higher off the faceplate than I had hoped. The caps that I'm using are Neutrik/RE-AN (Mouser # 550-77304), and will work well for the vertical faders, but I am looking for a more DJ style fader cap for the horizontal crossfaders.
Potentiometers and Knobs: The pots I'm using are from Futurlec (POT10K) and are pretty cheap. They've worked well for projects in the past, so I'm hoping that they'll work well for this project as well. The knobs used for the pots are Neutrik/Re-An Soft Touch control knobs (Mouser # 550-67005). They fit the Futurlec/Alpha pots perfectly, and have a nice grippy feel to them.
Buttons: I'm using a variety of buttons for the controller. The large arcade buttons are Seimitsu PS-14-DN 24mm Pushbuttons, available from Lizard Lick Amusements. A few of the buttons were purchased through ebay from a Chinese company (not the best buttons, it turns out). The rest were purchased from All Electronics, including the following part numbers: CAT# MPB-17 (cue point buttons), CAT# PB-159 (menu nav buttons), and CAT# PB-155 (general use black plastic buttons).
I've been trying to take pictures of the parts that I've ordered and received, more can be found over at my blog http://www.nonsilence.com
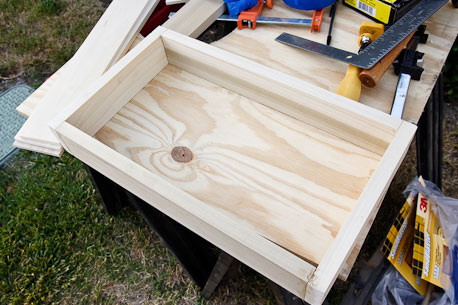
Building the Case: The case is also a DIY job, created from a few pieces of poplar. I have absolutely no woodworking skills, so I'm not at all unhappy with how it turned out, although it's certainly not perfect.
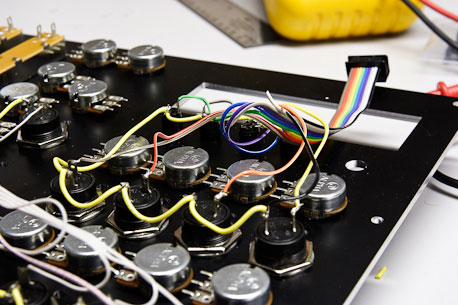
Wiring the Panel: Now comes the tedious and time consuming part of the build, wiring the front panel. For the most part, the PDF diagrams on the ucapps site that accompany each module are the keys to understanding the wiring sequence. I'm using ribbon cable, as it will be easy to attach to the modules, and keeps the overal spaghetti-ness of the panel down considerably.
The shot above shows the DIN (pushbutton) wiring completed. I've left the ribbon cabling long until I can determine how long the runs will need to be to get to the modules.
Here's a detail shot of the grounding sequence for the buttons. The black wire on the ribbon cable is connected to the VS pin on the DIN board. The rest go to their individual buttons. The black cable is then daisy-chained from one button to the next (via the yellow, thicker wire) until all of the buttons have been grounded.

