Table of Contents
Toolchain NotePad++ IDE Setup
for MIOS application development on Windows
The technical jargon:
This is the NotePad++ IDE section in a walkthrough on the process of developing MIOS Applications,
on Microsoft Windows XP,
primarily in C, utilising the MIOS C Wrapper
but also in ASM.
The IDE platform used will be Code::Blocks IDE
or NotePad++
and the applications will be built
for the MIDIBox Hardware Platform (MBHP)
stuffed with a Microchip PIC18F.
C code will be compiled with SDCC,
and assembled with GPUtils,
using MSYS to generate and run DOS-Console-based makefile scripts,
and MIOS Studio will be used for debugging on MBHP.
For PC emulation for debugging purposes, you may also use AC-Sim (AudioCommander's CSimulator)
compiled with GCC from MinGW.
Enough of that.
You should have come here after the Core Tools setup. This part of the tutorial can actually be skipped completely if you wish. It contains setup instructions for an optional component of the toolchain. If you are going to be coding your apps in C or ASM or especially in both, then you only need to install this one last application, and your toolchain is complete. If you are not sure if this is you, then it isn’t…. Read on… You can always come back to this step later if you need to.
NotePad++ Installation
NotePad++ is really a text editor, not a full-blown IDE, but it contains all the required features for our use, and as it contains highlighting for both ASM and C apps, is perfectly suited to MIDIBox use. You can just install it using the defaults, but if you want to tweak it up good and proper, here's how.
- Download the installer. You want the file named like npp.(version).Installer.exe [note:versions above 5.03 may not work with NPPExec or Explorer]
- Run the installer.
- Select your language, Click 'Next, 'I Agree', and 'Next'.
- Tick the box labelled 'Don't use %APPDATA%.'
- Expand the tree labelled 'Plugins' and untick the box labelled 'Light Explorer' (We'll install the full explorer plugin later)
- Click 'Install'
- When installation is complete, untick the box labelled 'Run NotePad++…' and click 'Finish'.
Tweaks
Plugins
These plugins are not mandatory but can be helpful:
- Function List - Creates a list of functions for you to jump to in your source files
- Explorer plugin - A window pane with an explorer tree, which also includes a favourites list - very handy!
- Download the dll files, and extract them to C:\Program Files\NotePad++\Plugins directory
Style
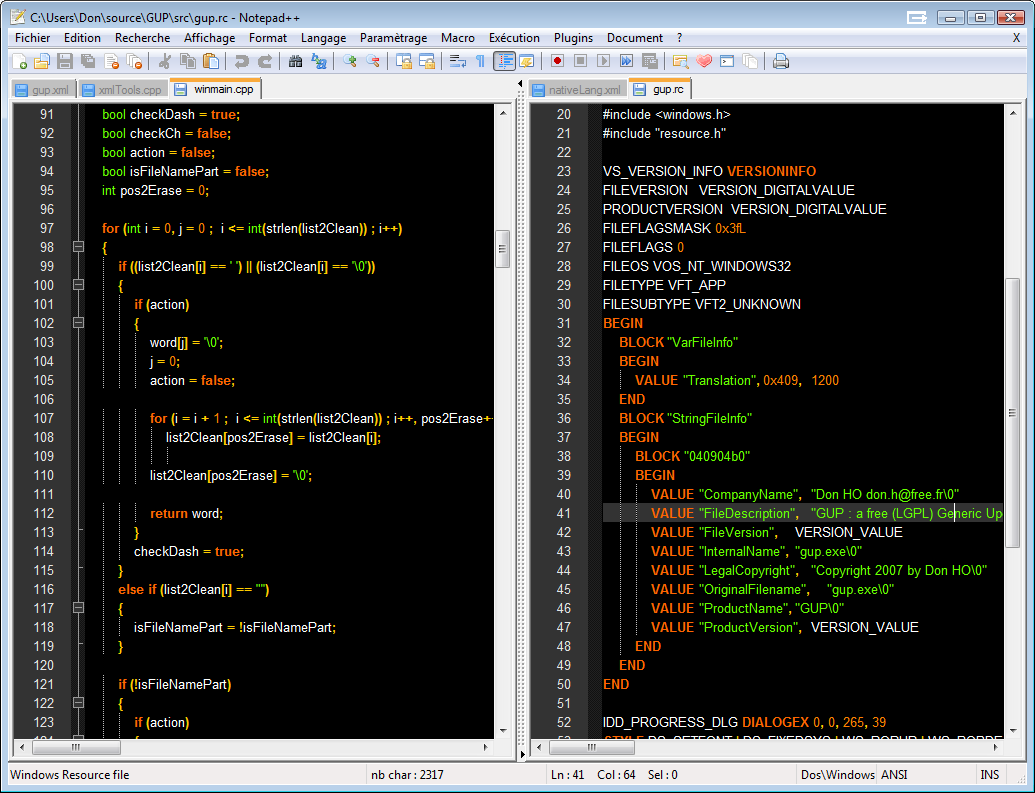
If you like the colour scheme in this screenshot, you can download the Vibrant Ink style. I also recommend the use of the consolas font.
- Download the file, and extract it to C:\Program Files\NotePad++\ . Overwrite any existing file.
- Run NotePad++. Click the 'Settings… Styler Configurator' Menu.
- Click the 'Default Style' and choose the programming font of your choice. I recommend consolas (11 point works well here but I zoom in and out a lot). You may like to see this forum thread: Best Coding Font Ever
- Select the “C” Language, and add user ext = “inc” (without the quotes)
- Select the “Assembler” Language, and add user ext = “inc” (without the quotes)
- Select the “Makefile” Language, and add user ext = “mk” (without the quotes)
- To show the panes for your plugins, hit:
- CTRL+ALT+SHIFT+V (Favourites)
- CTRL+ALT+SHIFT+L (Function List)
- CTRL+ALT+SHIFT+E (Explorer)
- You can drag the functions list over to the left side to dock it as a tabbed pane with Explorer and Favourites.
NPPExec Filters
In order to be able to double-click on an error and jump to that line (to fix your code) you need to tell NPPExec what the errors look like:
- Hit SHIFT+F6 to bring up the NPPExec plugin filter dialog. Fill it in as per this screenshot:

- Change to the 'Highlight' Tab. Fill it in as per this screenshot:

- Click OK
For reference, here are the entries for you to copy and paste. You can enter them manually, or, you can paste all of this into your “C:\Program Files\Notepad++\plugins\Config\NppExec.ini” file:
[Console]
Visible=0
OEM=1
SaveOnExecute=0
CmdHistory=1
SaveCmdHistory=1
NoInternalMsgs=0
Font=F1F(6)0(18)90010(D)3020131436F6E736F6C61730(30)
[ConsoleOutputFilter]
Enable=1
RecognitionMask0="*%FILE%:%LINE%Error*"
RecognitionEffect0="+E FF 00 00 -I +B -U"
RecognitionMask1="*%FILE%:%LINE%: error*"
RecognitionEffect1="+E FF 00 7F -I +B -U"
RecognitionMask2="*%FILE%:%LINE%Warning*"
RecognitionEffect2="+E FF 7F 00 -I -B -U"
RecognitionMask3="*%FILE%:%LINE%: warning*"
RecognitionEffect3="+E FF 7F 7F -I -B -U"
ExcludeDupEmpty=1
ExcludeMask=1
ExcludeLine0="_output/*mios-gpasm-tmp.asm*Warning [231]*"
[Restore]
LastSelectedScript=2
NPPExec Execute Preset
This will give you a preset to run a cleanup from within NotePad++:
- Hit F6 to bring up the NPPExec Execute dialog.
- In the 'Commands' Textbox, type the following:
cd $(CURRENT_DIRECTORY)\


make cleanall
- Click 'Save…', and type in a name like “MIOS clean” or something.
This will give you a preset to run make from within NotePad++:
- In the 'Commands' Textbox, type the following:
cd $(CURRENT_DIRECTORY)\


make
- Click 'Save…', and type in a name like “MIOS make” or something.
- Click 'Cancel' to exit (if you click OK, it'll run make!)
Now, when you want to make the file, you can just hit F6, make sure the 'MIOS make' preset is selected, and then hit Enter, and make will be called in the directory of the currently open file.
Messages will be shown in the output window, which will open automatically. If there are any errors, you can double-click the error and jump to the offending code :)
Have some eye candy:

Note for old projects (really, you should update your project for the new structure if possible):
This will give you a preset to run make.bat from within NotePad++:
* Hit F6 to bring up the NPPExec Execute dialog.
- In the 'Commands' Textbox, type the following:
cd $(CURRENT_DIRECTORY)\


make.bat
- Click 'Save…', and type in a name like “MIOS make.bat” or something.
- Click 'Cancel' to exit (if you click OK, it'll run make.bat!)
PIC ASM Highlighting
Copy and paste this code into a new file in your NotePad++ directory called C:\Program Files\Notepad++\userDefineLang.xml
<NotepadPlus> <UserLang name="PIC ASM" ext="asm inc"> <Settings> <Global caseIgnored="yes" /> <TreatAsSymbol comment="no" commentLine="no" /> <Prefix words1="yes" words2="no" words3="no" words4="no" /> </Settings> <KeywordLists> <Keywords name="Delimiters">000000</Keywords> <Keywords name="Folder+"></Keywords> <Keywords name="Folder-"></Keywords> <Keywords name="Operators">- ! % < = ></Keywords> <Keywords name="Comment"> 1 1 2 2 0; 0;;</Keywords> <Keywords name="Words1">_boden_ _cp_ _pwrte_ _wdt_ _wrt_enable_ _osc _debug_ _cpd_</Keywords> <Keywords name="Words2">END expand extern local noexpand banksel bankidel global idata pagesel udata
constant define end endc endm endif endw equ error errorlevel include #include #if #ifdef #ifndef #define #else #endif list messg nolist org
page processor radix set space subtitle title undefine variable else if ifdef ifndef while
</Keywords> <Keywords name="Words3">addwf andwf btg clrf crlw clrc clrdc clrz cpfsgt cpfslt cpfseq comf decf decfsz incf incfsz iorwf movf movwf mullw nop rlf rrf subwf swapf tris xorwf bcf bsf btg btfsc btfss addlw andlw bra call clrwdt goto iorlw movlw rcall rgoto retfie retlw return sleep sublw subwf xorlw option
addcf adddcf addwfc bc bdc bnc bndc bnz bz lcall lgoto movfw movff lfsr negf setc setdc setf setz skpc skpdc skpnc skpndc skpnz skpz subcf subdcf tstf
</Keywords> <Keywords name="Words4">indf pcl status fsr eecon pclath intcon option_reg 
tmr port eedat eeadr tris
bank cblock code da data db de dt dw fill __idlocs __maxram res __badram __config
</Keywords> </KeywordLists> <Styles> <WordsStyle name="DEFAULT" styleID="11" fgColor="FFFFFF" fontName="" fontStyle="0" /> <WordsStyle name="FOLDEROPEN" styleID="12" fgColor="000000" fontName="" fontStyle="0" /> <WordsStyle name="FOLDERCLOSE" styleID="13" fgColor="000000" fontName="" fontStyle="0" /> <WordsStyle name="KEYWORD1" styleID="5" fgColor="008000" fontName="" fontStyle="0" /> <WordsStyle name="KEYWORD2" styleID="6" fgColor="0080FF" fontName="" fontStyle="0" /> <WordsStyle name="KEYWORD3" styleID="7" fgColor="FF8000" fontName="" fontStyle="0" /> <WordsStyle name="KEYWORD4" styleID="8" fgColor="008000" fontName="" fontStyle="0" /> <WordsStyle name="COMMENT" styleID="1" fgColor="000000" fontName="" fontStyle="0" /> <WordsStyle name="COMMENT LINE" styleID="2" fgColor="8080C0" fontName="" fontStyle="0" /> <WordsStyle name="NUMBER" styleID="4" fgColor="80FF00" fontName="" fontStyle="0" /> <WordsStyle name="OPERATOR" styleID="10" fgColor="FFFF00" fontName="" fontStyle="0" /> <WordsStyle name="DELIMINER1" styleID="14" fgColor="000000" fontName="" fontStyle="0" /> <WordsStyle name="DELIMINER2" styleID="15" fgColor="000000" fontName="" fontStyle="0" /> <WordsStyle name="DELIMINER3" styleID="16" fgColor="000000" fontName="" fontStyle="0" /> </Styles> </UserLang> </NotepadPlus>
Now after you start NotePad++, your ASM files will be nicely highlighted. The above colour selections have been made to go with the black background in the “VibrantInk” style shown in the above screenshot. You may like to change the colours if you use a white background.
Settings
These settings make using notepad++ easier, but are not mandatory.
- Click the 'settings… Preferences' Menu.
- In the 'Global' Tab, tick 'Double Click to Close document'.
- In the 'Backup/Auto-Completion' Tab, tick 'Enable Auto-completion on each input'.
- Where it says “From 1 th input”, Click the “1”. A dialog box will pop up, type “3” into the box (without the quotes) and hit Enter.
- In the 'MISC' Tab, click the number next to “Max number history file” and a dialog box will pop up. Type “30” into the box (without the quotes) and hit Enter.
- Click Close.
IDE Setup Complete
If you made it this far, and you don't need to use AC-Sim, you're done. If that’s the case, enjoy your coding experience! Bye!
If you want to use ACSim, you may like to install Code::Blocks. You won’t break anything. :)
