Table of Contents
MIDIbox SEQ BLM 16x4 Control Surface PCB
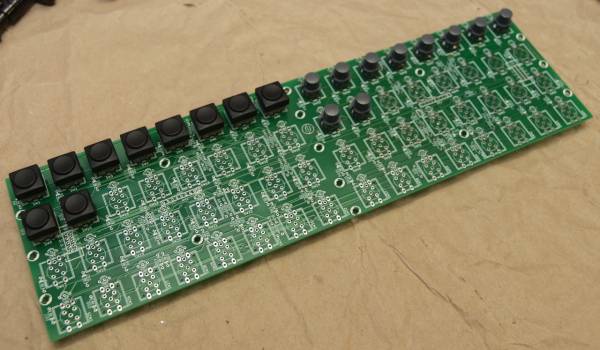
In order to enhance my MB SEQv4 with an internal 16×4 BLM (Button LED Matrix) I have created the printed circuit board shown in the lower half of the picture below. It has been verified to work and you can find all the information necessary to build one yourself on this page.
Overview
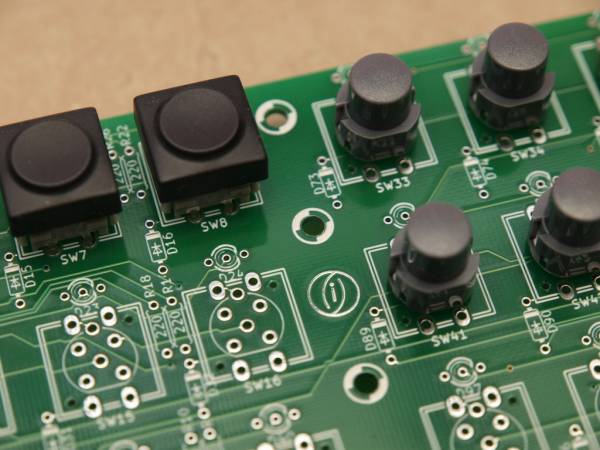
The board holds all necessary components including surface mount shift registers (DOUT and DIN) on the backside and connects via a single 10pin cable to J2 on Wilba's control surface board. Additional modules (BPM and TPD displays) can be connected to a second 10pin connector that loops through all serial I/O signals from J8/J9 of the Core32/LPC17 board. The board features duo LEDs and the very nice Marquardt 6425 series of buttons with the 16mm square caps.
The buttons do not align with Wilba's MB-SEQ frontpanel design. The reason for this is simple: In my front panel there is a TPD (Track Position Display), a step display, and a BPM display to the left of the button / Duo-LED matrix. A second reason is that the protoboard manufacturer I used (Gold Phoenix PCB) has a size limit that I had to respect.
Schematic
The schematic for the 16×4 BLM is based on the official one as proposed by TK over here. However, I have redrawn it to show all the components that are sitting on the PCB. Here it is.
PCB Layout
The layout of the PCB is rather straight forward. Placement of buttons and LEDs was predefined by the 16×4 matrix arrangement, and a certain number and distribution of mounting holes were required to prevent the board from flexing even under heavy manual treatment. Placement of all other components follows these constraints. As a result it was necessary to use SMD versions of the ICs. However, this is no big deal - with a bit of flux these are easily soldered after some practicing.
Here are the Gerber files for ordering the PCB from your favorite boardhouse. You are free to use them for non-commercial purposes only. In other words, you are not allowed to make money from my design 
There is no silkscreen layer for the backside of the PCB. However, each IC has its reference etched in copper next to its footprint. Also, pin 1 of each IC is clearly marked with a “1” next to the corresponding pad, and all 100nF SMD capacitors (C2-C7) sit close to the ICs.
The total size of the PCB is 335.15mm x 97.92mm.
PCB Layout v2.0
Meanwhile, I have created a version 2 of the board, which basically has all the features of the original one, plus it can hold three different types of switches:
- the Marquardt 6425 series (my favourite switches)
- ITT Schadow D6 series (TK's favourite switches)
- E-Switch 612-TL1100 series (the ones that Wilba used on the SEQ v4 board).
Where to buy?
If you are interested in building this, send a personal message (PM) to user ilmenator over at the MIDIbox forum (you have to register to be able to send PM). As of September 2025, I have PCBs available for 25€ each. I can also provide you with complete kits with Marquardt or D6 switches in black.
BOM
| Reference | Description | Package | Value | Quantity | Mouser | Reichelt | soselectronic |
|---|---|---|---|---|---|---|---|
| C1, C8 | capacitor | 2.54mm pitch | 100n | 2 | KERKO 100N | ||
| C2-C7 | capacitor | SMD 1206 | 100n | 6 | X7R-G1206 100N | ||
| D1-D8, D17-D24, D33-D40, D49-D56, D65-D72, D81-D88, D97-D104, D113-D120 | 3-legged duo LED | 3mm | common cathode | 64 | 859-LTL1BEKVJNN | ||
| D9-D16, D25-D32, D41-D48, D57-D64, D73-D80, D98-D96, D105-D112, D121-D128 | 1N4148 | DO-35 | 64 | 1N 4148 | |||
| RR1, RR2 | 1 + 8 Resistor network | SIL9 | 10k | 2 | SIL 9-8 10K | ||
| R1-R32 | 1/4W resistor | 220 | 32 | 1/4W 220 | |||
| R33, R34 | 1/4W resistor | 10k | 2 | 1/4W 10K | |||
| SW1-SW64 | push switch | Marquardt 6425.0101* | 64 | 979-6425.0101 | TASTE 6425.0101 | 1325 | |
| key cap | Marquardt 826.000.011 | 16x16mm | 64 | TASTE S 826 (red!) | 1489 | ||
| U1-U6 | 74HC595 | SO16 | 6 | 863-MC74HC595ADG | SMD HC 595 | ||
| U7, U8 | 74HC165 | SO16 | 2 | 863-MC74HC165ADR2G | |||
| J1, J2 | connector 2×5 | 2 | WSL 10G |
* Button caps usually have to be ordered separately - these should be the 16x16mm types, not the 19x19mm!
Capacitors C2-C7, ICs U1-U8, and connectors J1-J2 are placed on the backside of the PCB. All other components are sitting on the front!
Frontpanel
I have had my frontpanel laser cut at Formulor, the German branch of Ponoko. Here is the template:
I used Adobe Illustrator to create the design. It can be downloaded in .ai, .dxf and .dwg format here. The latter two have been exported from Illustrator, I don't know if they are scaled properly, so be warned!
And finally, this is how it looks like with the PCB mounted to the frontpanel using 8.5mm long M3 spacers (8mm spacer and a 0.5mm thick washer). The front panel is made from 3mm thick acrylic and the buttons are sitting flush inside the frontpanel. This way it is easy to slide across the panel to activate neighboring buttons.
Note that I am using the 15.5mm button caps - apparently, Marquardt also has some in 18.3mm. Make sure you don't accidentally buy the wrong ones!
Config
You are most probably going to use this board together with the MB-SEQ V3/V4 PCB designed by Wilba. To make it easy for you, here is the updated config file that holds all the shift register definitions necessary for the board to work properly. Then, J2 on this PCB has to be connected to J2 on Wilba's PCB.


